部署在二进制安装篇有写
邮件通知
配置并启动 alertmanager
1
2
3
4
5
6
7
8
9
10
11
12
13
14
15
16
17
18
19
20
21
22
23
24
25
26
27
28
29
30
global: resolve_timeout: 5m smtp_from: 'xxxx@qq.com' smtp_smarthost: 'smtp.qq.com:465' smtp_auth_username: 'xxxx@qq.com' smtp_auth_password: 'uukxxxxdvnxzbiaf' smtp_require_tls: false smtp_hello: '@qq.com' route: group_by: ['alertname' ] group_wait: 10s group_interval: 2m repeat_interval: 5m receiver: 'web.hook' receivers: - name: 'web.hook' email_configs: - to: 'xxxx@qq.com' inhibit_rules: - source_match: severity: 'critical' target_match: severity: 'warning' equal: ['alertname' , 'dev' , 'instance' ]
配置 prometheus 报警规则
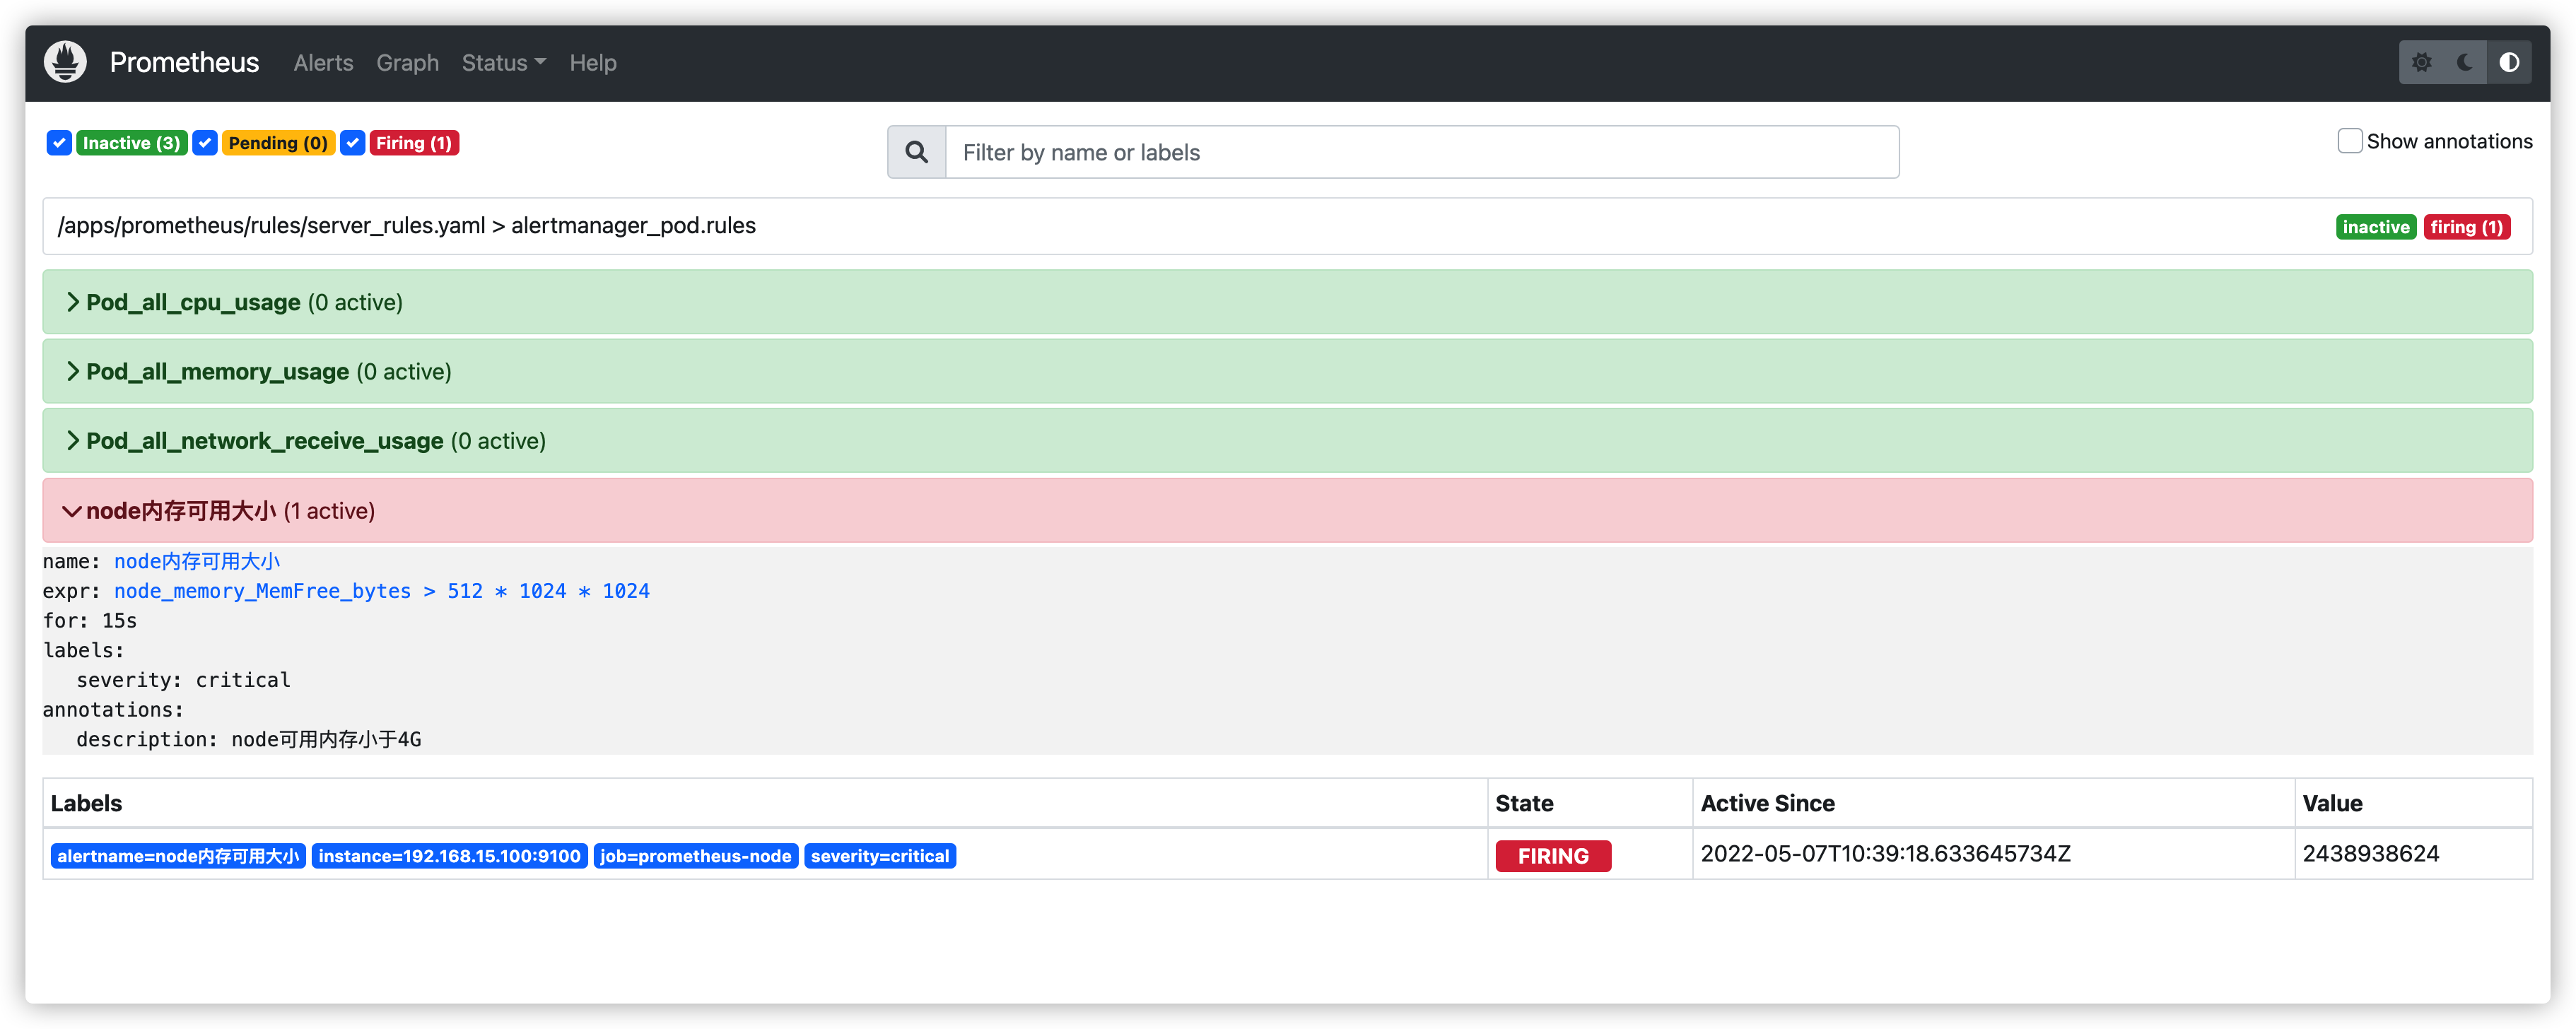
1 2 3 4 5 6 7 8 9 10 11 12 13 14 15 16 17 18 19 20 21 22 23 24 25 26 27 28 29 30 31 32 33 34 35 36 37 38 39 40 41 42 43 44 45 46 47 48 49 50 51 52 53 54 55 56 57 58 59 60 61 62 63 64 65 66 67 mkdir /apps/prometheus/rules && cd /apps/prometheus/rules vim server_rules.yaml groups: - name: alertmanager_pod.rules rules: - alert: Pod_all_cpu_usage expr: (sum by(name)(rate(container_cpu_usage_seconds_total{image!=""}[5m]))*100) > 10 for: 2m labels: severity: critical service: pods annotations: description: 容器 {{ $labels.name }} CPU 资源利用率大于 10 % , (current value is {{ $value }}) summary: Dev CPU 负载告警 - alert: Pod_all_memory_usage expr: sort_desc(avg by(name)(irate(node_memory_MemFree_bytes {name!="" }[5m ]))) > 2147483648 for: 2m labels: severity: critical annotations: description: 容器 {{ $labels.name }} Memory 资源利用率大于 2G , (current value is {{ $value }}) summary: Dev Memory 负载告警 - alert: Pod_all_network_receive_usage expr: sum by (name)(irate(container_network_receive_bytes_total{container_name="POD"}[1m])) > 50 *1024*1024 for: 2m labels: severity: critical annotations: description: 容器 {{ $labels.name }} network_receive 资源利用率大于 50M , (current value is {{ $value }}) - alert: node内存可用大小 expr: node_memory_MemFree_bytes > 512 *1024*1024 for: 15s labels: severity: critical annotations: description: node可用内存小于4G - name: alertmanager_node.rules rules: - alert: 磁盘容量 expr: 100 -(node_filesystem_free_bytes{fstype=~"ext4|xfs"}/node_filesystem_size_bytes {fstype=~"ext4|xfs" }*100) > 80 for: 2s labels: severity: critical annotations: summary: "{{$labels.mountpoint}} 磁盘分区使用率过高!" description: "{{$labels.mountpoint }} 磁盘分区使用大于80%(目前使用:{{$value}} %)" - alert: 磁盘容量 expr: 100 -(node_filesystem_free_bytes{fstype=~"ext4|xfs"}/node_filesystem_size_bytes {fstype=~"ext4|xfs" }*100) > 60 for: 2s labels: severity: warning annotations: summary: "{{$labels.mountpoint}} 磁盘分区使用率过高!" description: "{{$labels.mountpoint }} 磁盘分区使用大于80%(目前使用:{{$value}} %)"
Prometheus 加载报警规则
vim /apps/prometheus/prometheus.yml
1
2
3
4
5
6
7
8
9
alerting: alertmanagers: - static_configs: - targets: - 192.168 .15 .100 :9093 rule_files: - /apps/prometheus/rules/server_rules.yaml
规则验证
1
2
3
./promtool check rules rules/server_rules.yaml Checking rules/server_rules.yaml SUCCESS: 4 rules found
重启 prometheus
1 systemctl restart prometheus.service
使用 amtool查看当前告警
1 ./amtool alert --alertmanager.url=http://192.168.15.100:9093
prometheus 报警状态
inactive:没有异常
pending:已经出发阈值,但未满足告警持续时间(即rule中的for字段)
firing:已经触发阈值并满足条件发送至alertmanager
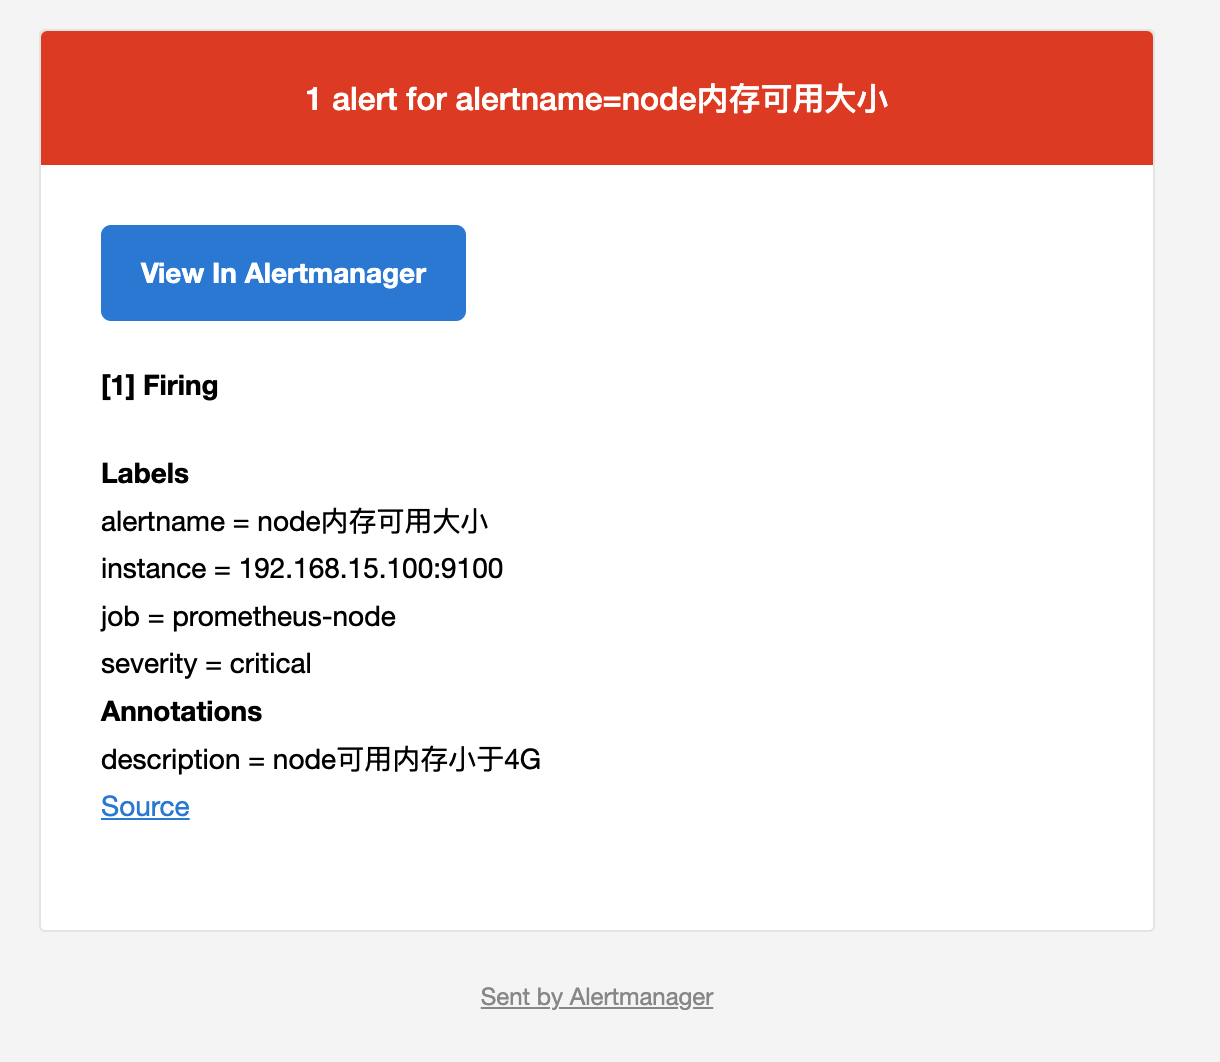
邮箱验证邮件:
钉钉告警通知
钉钉群创建机器人 - 关键字认证
1
2
3
4
Webhook 复制 * 安全设置 (☑️勾选自定义关键字) alertname
钉钉认证 - 关键字
1
2
3
4
5
6
7
8
9
10
11
12
13
14
15
16
17
# 创建脚本目录 mkdir /data/scripts -p vim /data/scripts/dingding-keywords.sh # !/bin/bash source /etc/profile # PHONE=$1 # SUBJECT=$2 MESSAGE=$1 /usr/bin/curl -X "POST" "https://oapi.dingtalk.com/robot/send?access_token=ba76276cd923xxe5dcd653fxxxx4b71c4a23e8c4eb8e91446840d527c8d9cd4e' \ -H 'Content-Type: application/json' \ -d '{"msgtype": "text", "text": { "content": "'${MESSAGE}'" } }'
测试发送消息
1
2
3
4
5
6
/usr/bin/curl -v -XPOST \ -H 'Content-Type: application/json' \ -d '{"msgtype": "text","text": {"content": "namespace=default\npod=pod1\ncpu=87%\n 持续时间=4.5m\nalertname=pod"}}' 'https://oapi.dingtalk.com/robot/send?access_token=766379d2ee757779c06ea6ff531d2d52640571293c3e1eedd42d71c19e60af07' ------------------- # 或者按上面的脚本去 bash /data/scripts/dingding-keywords.sh 后接参数
钉钉接收到告警信息
部署 webhook-dingtalk
1
2
3
4
5
6
7
8
9
10
# 下载解压 cd /apps wget https://github.com/timonwong/prometheus-webhook-dingtalk/releases/download/v1.4.0/prometheus-webhook-dingtalk-1.4.0.linux-amd64.tar.gz tar xf prometheus-webhook-dingtalk-1.4.0.linux-amd64.tar.gz # 运行 cd prometheus-webhook-dingtalk-1.4.0.linux-amd64 nohup ./prometheus-webhook-dingtalk --web.listen-address="192.168.15.100:8060" --ding.profile="alertname=https://oapi.dingtalk.com/robot/send?access_token=766379d2ee757779c06ea6ff531d2d52640571293c3e1eedd42d71c19e60af07" &
alertmanager 修改配置
vi /apps/alertmanager/alertmanager.yml
1
2
3
4
5
6
7
8
9
10
11
12
13
14
15
16
17
18
19
20
21
22
23
24
25
26
27
28
29
30
31
32
33
34
35
36
global: resolve_timeout: 5m smtp_from: 'xxxx@qq.com' smtp_smarthost: 'smtp.qq.com:465' smtp_auth_username: 'xxxx@qq.com' smtp_auth_password: 'gtiuxxxxngxybhdi' smtp_require_tls: false smtp_hello: '@qq.com' route: group_by: ['alertname' ] group_wait: 10s group_interval: 1m repeat_interval: 5m receiver: 'dingding' receivers: - name: dingding webhook_configs: - url: 'http://192.168.15.100:8060/dingding/alertname/send' send_resolved: true - name: 'web.hook' email_configs: - to: 'xxxx@qq.com' send_resolved: true inhibit_rules: - source_match: severity: 'critical' target_match: severity: 'warning' equal: ['alertname' , 'dev' , 'instance' ]